OBS Studio is the open-source software that we can use to record our video and use it for live streaming as well, one of the most amazing things about OBS Studio is that it is free to use. OBS Studio offers many amazing features, but many users face the problem of pixelated video recordings. If you are a content creator or use OBS studio for professional work then pixelated and blurry videos can make your content look unprofessional.
So If you’re struggling with pixelation recording and you are thinking about how to fix recording from going pixelated in OBS Studio, don’t worry In this guide, you will completely understand the common causes of pixelation and how to fix recording from going pixelated in OBS Studio. Whether you’re new to OBS Studio or a seasoned user, these tips will help you significantly improve your video recording quality.
Table of Contents
Reasons for Pixelation in OBS Studio
Pixelation in recordings occurs when video quality degrades, making the image appear blocky or blurry. This is often caused by low bitrate settings, bad encoding settings, or incorrect resolution and frame rate settings. OBS Studio comes with default settings but those settings aren’t always suitable for every computer or laptop due to specification, so adjusting these settings can make a big difference.
Settings for High-Quality Recordings
If you want to know how to prevent the recording from going pixelated in OBS Studio, here are the best settings that we can use to get professional and high-quality video recordings in OBS Studio.
Step 1.
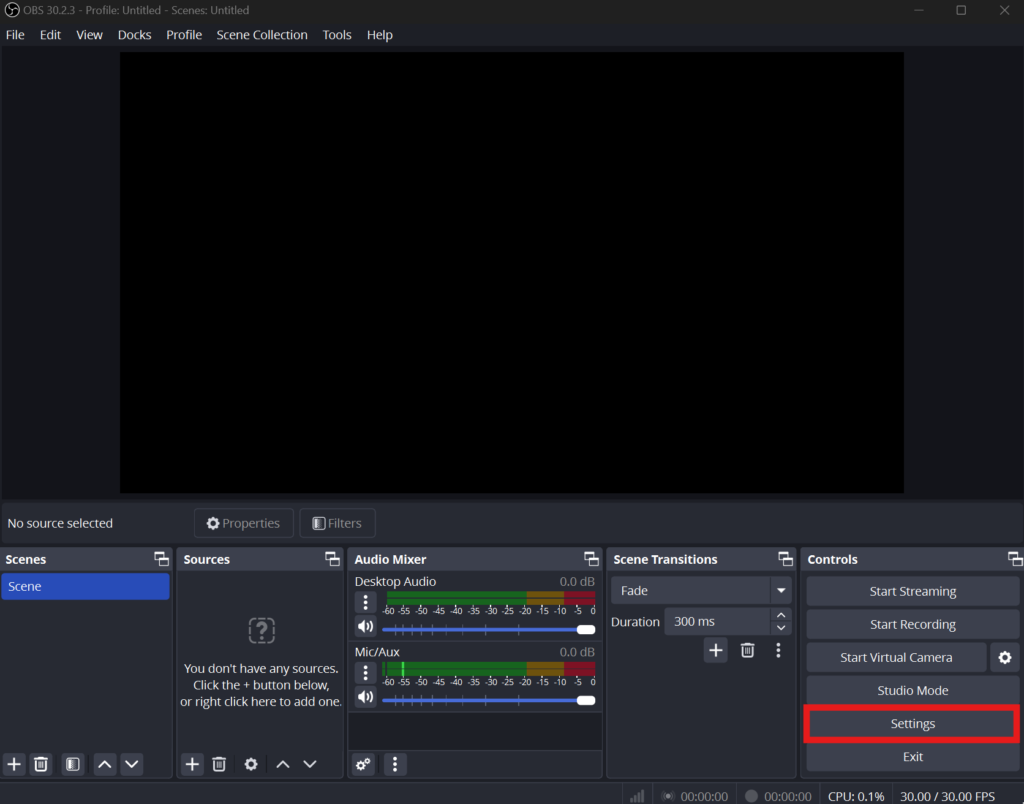
Open up your OBS Studio and go to the “Settings” option.
Step 2.
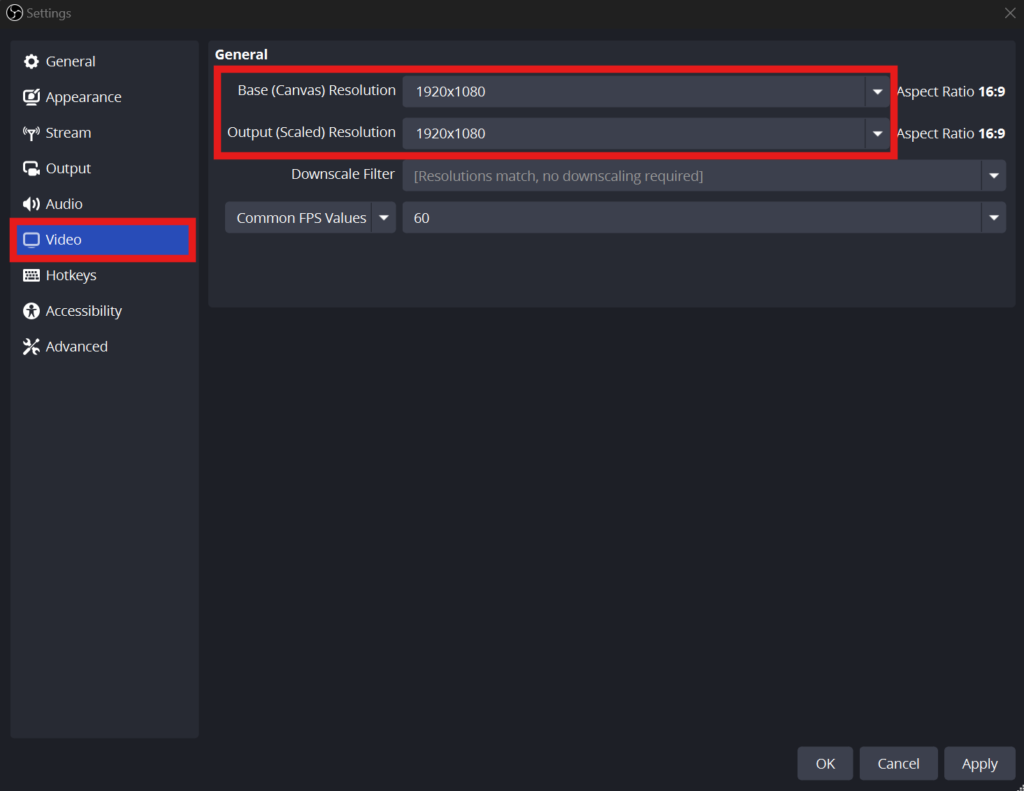
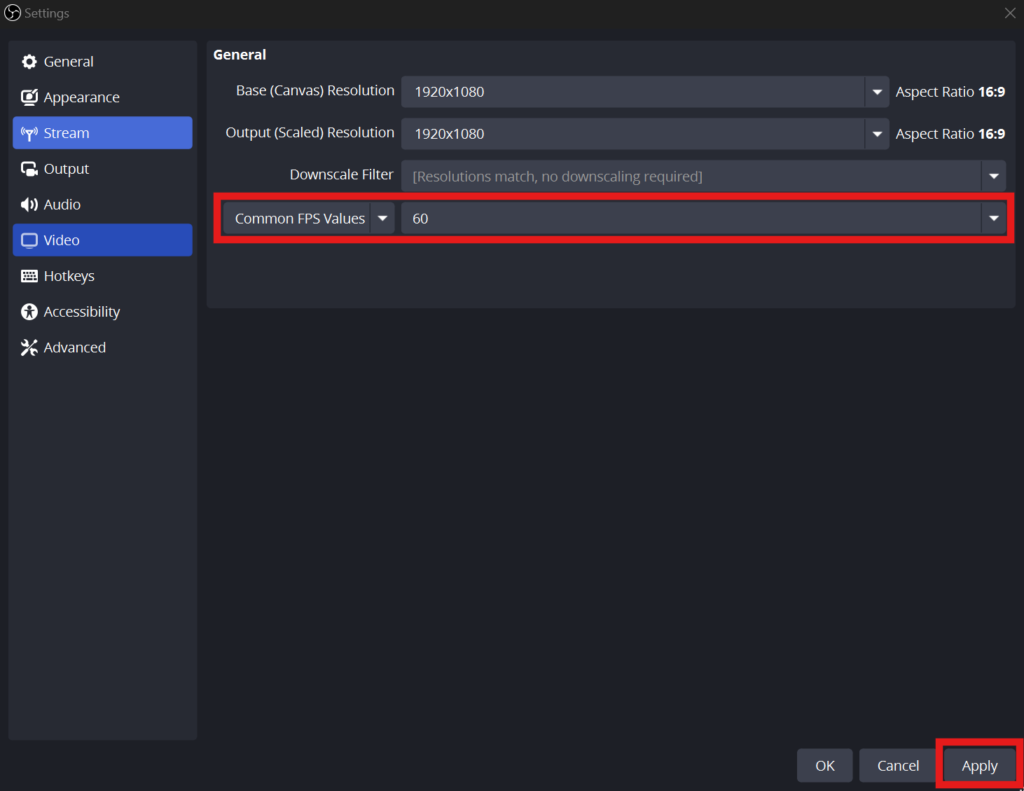
Now select the “Video” option from the left side and then change the “Base Resolution” to 1920×1080. Then also set “Output Resolution” to 1920×1080. This will ensure you the recordings are 1080p high quality.
Step 3.
After selecting the resolution, change the “Common FPS Values” to 60. Then press “Apply” in the bottom right corner to save the all settings.
Step 4.
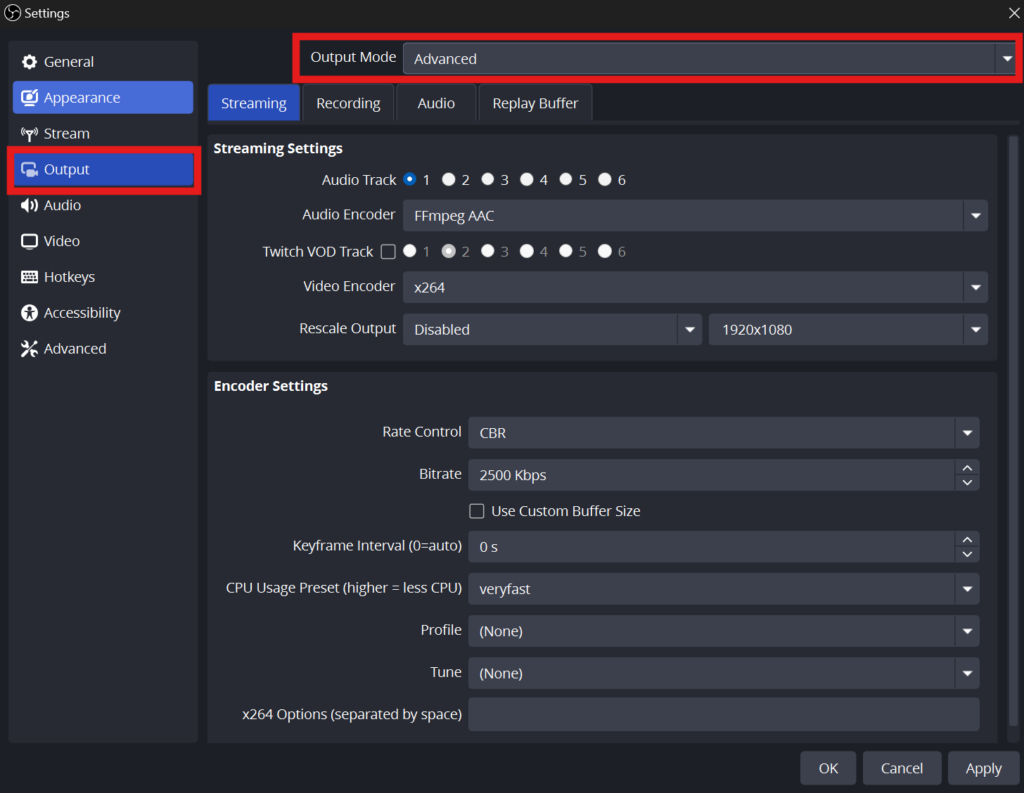
Go to the “Output” option on the left side and select the “Output Mode” to the “Advanced”.
Step 5.
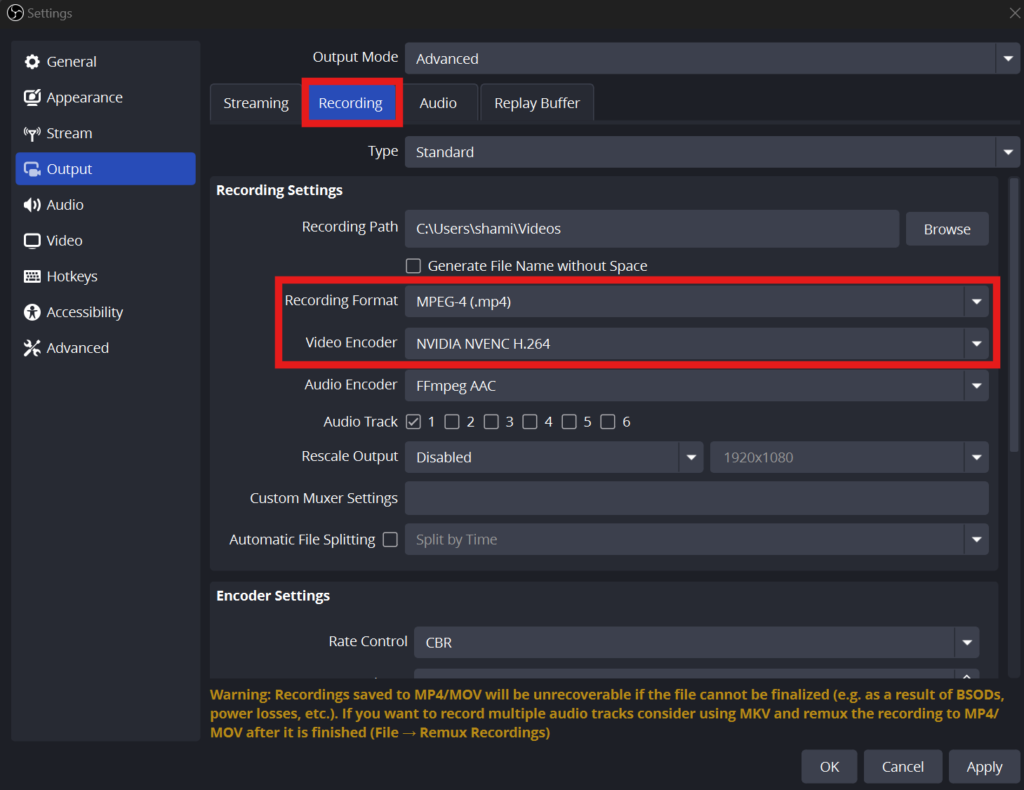
Select the “Recording” option and the “Recording Format” to “MPEG-4(.mp4)” because for the best quality and file size this format is the best to use. After that, we will select the “Video Encorder” under the “Recording Format”. In this case, I’m selecting the “NVIDIA NVENC H.264” as a “Video Encoder” But if you don’t have an Nvidia graphic card, then you can also select the “x264” for “Video Encoder”
Step 6.
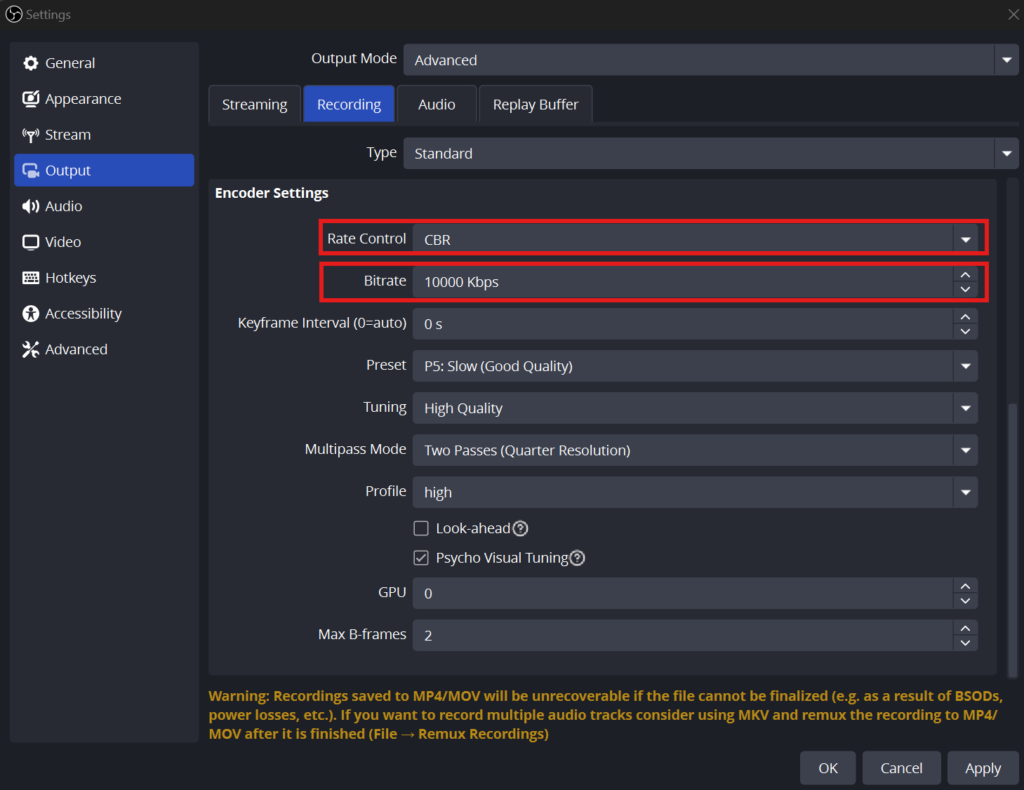
Now we will scroll down to edit the “Encoder Settings”. You should change the “Rate Control” to CBR and change the “Bitrate” to 10000Kbps. By increasing the Bitrate we can also increase the video quality but the size of the video will also increase. The 10000Kbps Bitrate is the sweet spot for a good-quality video. After applying all these settings just press the “Apply” button and all settings will save and you can record the video with quality.
Final Thoughts
Pixelation in OBS Studio recordings can be frustrating, if you are a content creator or a professional then blurry and pixelated video quality will present your content as unprofessional. OBS studio comes with default settings that can not be adjusted according to your computer or laptop and that the one of the main reasons for pixelated video recording. By adjusting the OBS Studio settings according to our needs and computers, we can see an extreme improvement in the quality of our recordings. With these tips, you’re on your way to solving pixelation problems and creating high-quality recordings that will impress your viewers. Happy Recording!
